How to create a wireframe kit in Adobe XD

Wireframing is the skeleton of a website or app. Before you design anything, you need to create simple low-fidelity wireframes for the general layout and to map out the user journey flow.
Once you’ve created one wireframe, you’ll probably make many more just like it. That’s when you should start to create your own wireframe kit. Spend less time making the same thing repeatedly and more time creating solutions.
A wireframe kit is a template file you create with various components you can drag and drop. In this article, I’ll be sharing screenshots referencing Adobe XD but it’s the same idea no matter what your preferred design software is.
The purpose of wireframing is to get your ideas out and generate as many solutions as possible. This isn’t the time to focus on design details. Use gray boxes and lines to signify common design elements such as headlines, body copy, photos, CTAs, and more.
Prefer to watch a tutorial video?
Check out this video where I walk you through how to create a wireframe kit step-by-step in Adobe XD:
Make your first wireframe kit
Open your design software, create a new file, and save it as something like “Wireframe-kit-template”. This is now your master file.
1. Create your first wireframe for a landing page
If you already have one you can start with it but I prefer to start with a clean slate. Create a new artboard sized at 1920 x 1080 px.
Use rectangles to create the elements of your landing page. For images, draw an X through the box. Use multiple thin dark gray rectangles where you place typography in your design. I like to create multiple versions, for example, a center-aligned and left-aligned version for an H1 (header 1) text.

Examples of how to use gray boxes for H1 text, body copy, and CTAs for wireframes

Wireframe components for various proportioned photos and footer
After you finish creating your first landing page wireframe, now it’s time to turn those commonly used elements into a component so you can use them over and over again for future wireframes.
2. Use components for wireframe element
Once you create these elements, turn them into components. To do this in Adobe XD, use the keyboard shortcut Command + K or right-click and select Make Component.

Command + K or right-click to make a component in Adobe XD
You’ll notice how once you turn a selection of objects into a component, the blue bounding box shifts to a green bounding box with a diamond shape in the top left-hand corner.
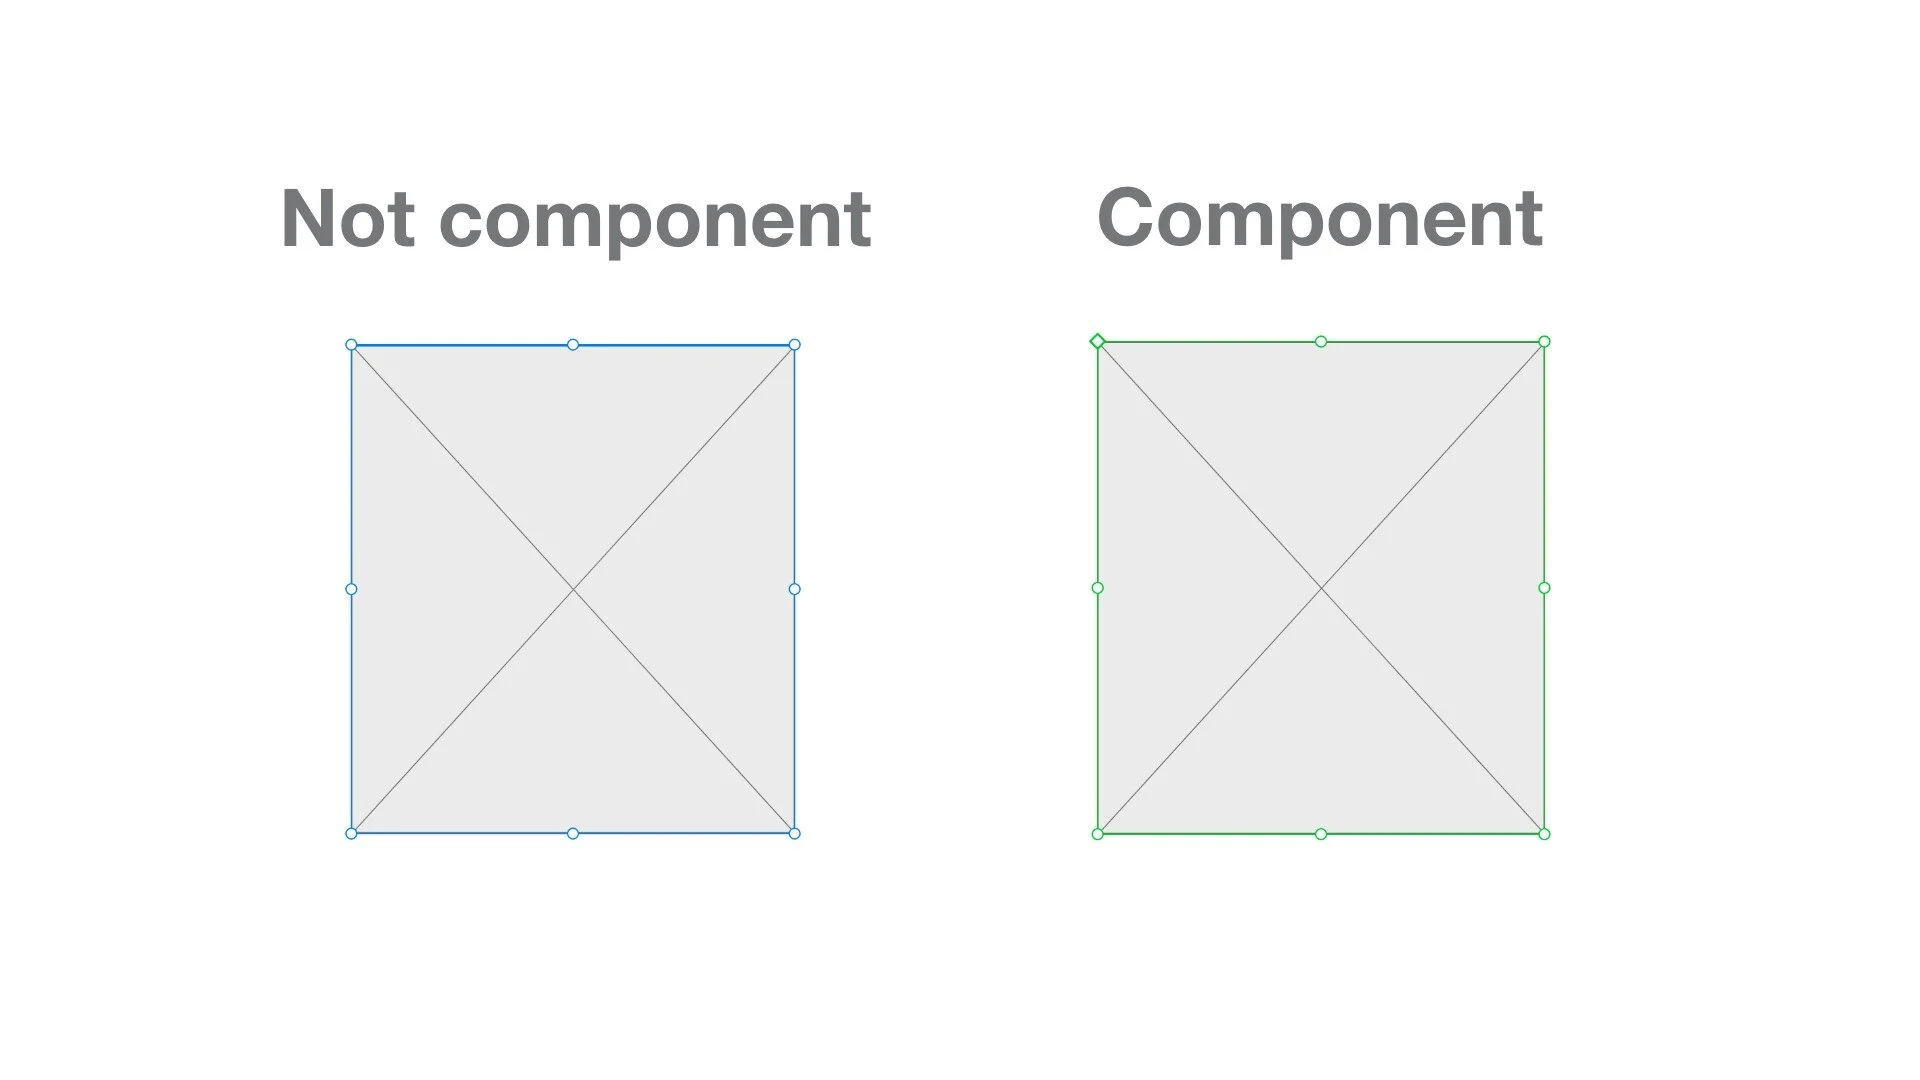
Blue bounding vs a green bounding box for components
As you continue to turn all of your wireframe elements into reusable components, be sure to name them accordingly. This can get messy as time goes by so keep titles short and succinct.

Accurately label your components
3. Use newly created components to create more wireframes
Continue to create multiple wireframes using the components you’ve just created. If you create a new design element or variation of it, turn it into a component.
Many times I’ll create a new component from a component. Note: This does not change the original component. However, if you do want to change the original component, use the keyboard shortcut Shift + Command + K or right-click and select Edit Main Component.
This will shift your screen to the first instance of the component, where you can make a change that will carry through to all instances of this component.

Shift + Command + K or right-click and select Edit Main Component
Make sure you’re bringing in new elements for your wireframes so you can create as complete a kit as possible. Notice how all of these wireframes have some common design elements yet they’re completely different.

Landing page wireframe examples
4. Create mobile versions of wireframes and components
Once you feel you’ve created all the necessary components for your desktop wireframes, it’s time to switch to mobile. You’ll be recreating the same exact components but the main difference is you’ll need to adjust the sizing to suit the new canvas size.
Drag and drop your components, resize to fit, then Command + K, name the component the same but adding Mobile so you’ll know the difference between the 2 components.
You may find you’ll need to create new design elements you didn’t create for the desktop version, for example, a hamburger menu icon.

Examples of mobile wireframes
5. Clean up your components
Once you’re done creating mobile versions of your wireframes and components, spend some time cleaning up your file. I go through all my components to make sure they’re labeled correctly.
I also like to rearrange them in alphabetic order, this makes it easier for me to find when I make the wireframes for my next project. But you should order your components in a way that makes sense to you.

Examples of component names for wireframes
When you’re done, your template file might look something like this. Mobile wireframes next to the desktop version and your saved components on the left side of the screen.
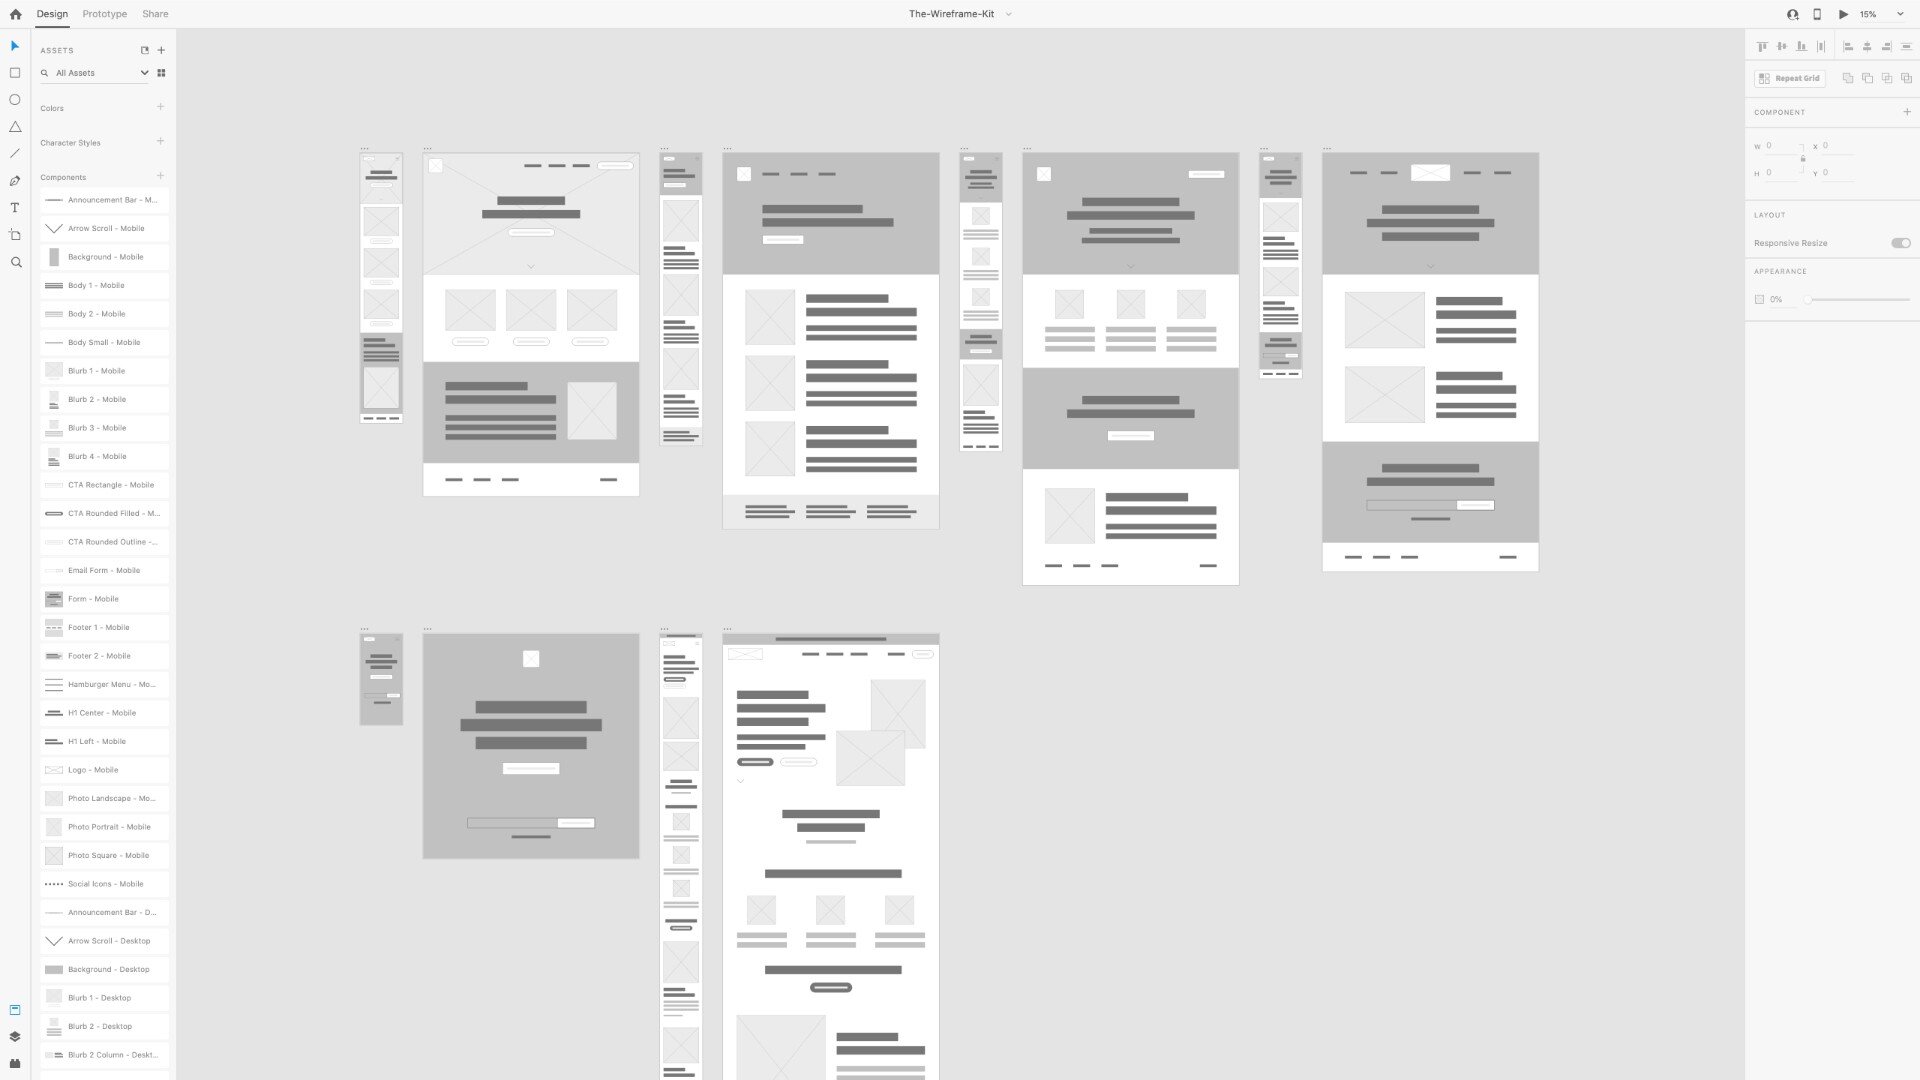
Mobile and desktop wireframes and components in Adobe XD
6. Continue to update your kit
Realize this kit is a work in progress. As you continue to use the template file for future wireframing projects, you’ll notice any bugs, missing components, or ways you can improve it. But now you have something to start with so you’re not creating wireframes from scratch anymore (and saving yourself a lot of time)!
Your kit can be as simple or complex as you want it to be. I like to have many components so I don’t have to create anything from scratch. But maybe you prefer less. Whatever works best for you, that’s the beauty of creating a custom kit.
Ready-to-use wireframe kit
Maybe you want to skip the whole process of creating your own wireframe kit from scratch and start with a premade one. You can check out the exact one I created shown above, The Wireframe Kit for Adobe XD.
There’s also plenty of other wireframe kits available out there to purchase. They can range anywhere from a few dollars to well over $100, depending on how in-depth it is.
Once you make something twice, turn it into a template
Now that you’ve created your first wireframe kit, you may want to create other versions. For example, one I’m working on next is specifically designed for app wireframes.
But aside from wireframe kits, I also encourage you to create other template files. If you ever find yourself creating something more than once, it’s time to make it into a template. I’d rather spend my time creating than redoing the same work over and over.
Create wireframes fast
Check out this video to see my process for how to create wireframes fast: